
Author: wickedAdmin

  • Potted plants bring warmth and life to your home

    Potted plants bring warmth and life to your home

    Potted plants bring warmth and life to your home or lanai. It is necessary to select plants that will fit the growing conditions in your home as there may be adverse growing conditions like inadequate light, temperature fluctuations and low humidity. The most important environmental factor for growing healthy plants indoors is adequate light. Plants can differ a lot in their light intensity requirements. Plants with colored leaves like coleus and croton, and flowering plants or succulents grow best in full sunlight. Ferns, philodendrons and other foliage plants grow well in indirect light. You can use a light meter held near the plant’s foliage to determine the light intensity.
    Following are light requirements for some common plants.
    Low light. Location is usually more than six feet from windows, no indirect light, in hallways. Cast iron plant, Parlor palm, Bamboo palm, jade plant, Corn plant, Bromeliad, Snake plant, Birdnest fern.
    Medium light. Location is usually three to six feet from windows, average well lighted areas. Asparagus fern, Begonia, Schefellera, Fishtail palm, Areca palm, Grape ivy, False aralia, Dracena, Figs, Rubber plant, English ivy, Philodendron, Boston fern, Staghorn fern.
    High Light. Location within three feet of south, east or west facting windows. Zebra plant, Norfolk-island pine, Ponytail palm, Calamondin orange, croton, coffee, Ti-plant, Philodendron, Ming aralia, African violet, Christmas cactus.
    You can also replace or supplement natural light with artificial light. Standard cool white and warm white fluorescent lamps are both good choices. Or there are a variety of fluorescent grow lamps available in stores.
    A daytime temperature of 65 degrees F to 75 degrees F and about 10 degrees lower at night is best for most plants. The lower temperature at night enables the plants to regenerate new tissues. Plants grown in continuously high temperatures can become spindly and less resistant to disease and insect attacks. A sudden temperature drop can inure plants if they have not acclimated to the lower temperatures first. And temperatures below 50 degrees F for extended periods can cause permanent damage to many plants. Damaged plants will wilt followed by yellowing leaves which then drop off. Avoid placing plants in hot or cold spots like on top of a television or too close to heating or cooling vents.
    Most plants prefer a relative humidity of 40 to 60 percent. Most homes have humidity levels below 40 percent, especially when heating systems are on. When the surrounding air is dry, plants lose water from leaf tissues at a faster rate than can be absorbed through the root system. When this happens leaf tips turn brown and flower buds fall off flowering plants. You can install a humidifier or you can place the plants on a two or three inch bed of wet gravel. The water evaporating from the gravel increases the humidity around the plants. The bottom of the pot should never sit in the water as this will cause water logged soil which can result in root damage. Placing the plants close together helps them create their own humidity.
    Good air circulation is also necessary for healthy plants but they should not be placed where there are drafts or strong cross air currents.
    Improper watering can cause death for indoor plants. When the soil remains saturated, root systems are unable to function properly because of lack of oxygen in the soil. Certain conditions determine the amount and frequency of watering. Organic potting soils retain more water than sandy soil. Plants in clay pots dry out faster than those in glazed or plastic pots. Plants in small pots dry faster than larger pots. Plus different species have varying water requirements. Some like to be watered when the soil is dry to the touch while others should be watered before the soil is completely dry. The rule to follow when watering is to water when necessary. The best way to gauge that is to stick your finger in the soil up to the first joint. If it is dry at the finger- tip you need to water. When potting mix begins to dry, it can shrink away from the sides of the pot. It will also become lighter in color and weight. When watering is required, water thoroughly. Apply enough room temperature water until it runs out of the bottom of the pot. This type of watering helps flush out the excess salts which can accumulate plus it guarantees that the bottom of the pot is properly watered. But do not allow the pot to stand in water too long. Empty the drip saucer if necessary.
    The growth rate of most indoor plants is much less than that of plants grown in a greenhouse. As a result, indoor plants do not need as much fertilizer as greenhouse plants. Plus rapid new growth can cause plants to outgrow their locations. Interior plants under active growing conditions should be fertilized every two to three months. During winter months or under conditions of low light the frequency of fertilization should be reduced. There are many special fertilizers available for indoor plants. Use as directed on the label.
    Improper cultural practices may result in problems. Brown leaf tips may be caused by too much fertilizer or dry excessively dry soil. Yellowing or dropping leaves are caused by air pollution, low light, chilling, overwatering or poor drainage, or root decay from soil borne diseases or insect pests. Weak growth or light green or yellow foliage is caused by too intense light, lack of fertilizer, root rot or poor root system. Small leaves and long internodes indicate too little light. Small leaves and short internodes may e caused by lack of fertilizer or being too dry. Small leaves and leaves that curl under may indicate too much light.
    Insects that attack houseplants include mealybugs, spider mites, aphids, scales, whitefly and fungus gnat maggots. To control insects be sure you bring home pest free plants. Isolate new plats for at least a month before placing them with other plants. Use sterilized potting soil. Spraying plants with a forceful stream of room temperature water every two weeks will remove insects before they have a chance to become established. This is best done outdoors or in a laundry sink. It also helps keep foliage clean and free of dust. Washing with soapy water and a soft cloth may be all that is needed to remove aphids, mealybugs and scale insects from broadleaf plants. Use two teaspoons of a mild detergent to one gallon of water. Insects can also be picked off by hand. For severe infestations chemical control may be needed. There are many premixed products that are ideal for in home use.
    Indoor plants have few disease problems. This is partly because of the low humidity I the home. Most diseases spread by spores which require moisture for growth.
    With a little knowledge about the plants you want to grow in your home this can be a successful and rewarding way to bring a little nature indoors.
  • Issue of trees near power lines

    Issue of trees near power lines

    LCEC (Lee County Electric Company) included a flyer in their latest bill discussing the issue of trees near power lines. When deciding to plant trees on your property proper tree selection is very important. You should plant the right tree in the right place. Always consider the mature size of a tree when planting.
    Pay particular attention to the location of power lines when selecting a site. A single tree that contacts a power line can interrupt electrical power to many people. Overhanging limbs or trees too close to the electrical lines can break or fall off, especially during storms and high winds. I have noticed a disturbing trend, on Marco Island, of people planting palms and trees directly under or too close to the power lines. With hurricanes and thunder storms accompanied by high winds a common summer occurrence, power outages from these poorly planted trees could unfortunately also become a common occurrence.
    Planting tall growing trees under or near power lines will require pruning them to maintain safe clearance from the wires. This pruning may result in the tree having an unnatural appearance and could lead to a shortened life span. This stress will also leave them more susceptible to insects and diseases. In the case of palm trees it almost certainly will mean death as the heart of the tree grows into the lines. Children or adults climbing these trees can be severely injured or even killed if they come in contact with the wires. Proper selection and placement of trees around overhead utilities can eliminate public safety hazards, reduce expenses for utilities and their customers, and improve the appearance of landscapes.
    Other considerations before planting include proximity to your house or other structures. Tree limbs can cause structural damage as well as provide a route for rodents and insects into your home. Also, be sure to plant trees far enough apart so they don’t interfere with each other as they mature. And consider your neighbor when you plant a tree. Will it cover half of his backyard or interfere with his landscape when mature?
    The following are lists of some common trees and their height at maturity. Visualize this mature size when selecting a site for your tree.
    Small trees – Less than 20′ at maturity. These can be planted adjacent to power lines, etcetera.

    Sweet Acacia

    Dwarf Poinciana

    Bottlebrush

    Citrus

    Silver Buttonwood

    Loquat

    Hibiscus Standards

    Tree Ligustrum

    Frangipani

    Medium trees – 20′ to 30′ height at maturity. Should have a 20′ setback from power lines, etcetera.
    Orchid Tree

    Seagrape

    Dahoon Holly

    Podocarpus

    Tabebuia

    Geiger
    Large trees – Greater than 30′ at maturity. Should have a 30′ setback from power lines, etcetera.
    Red Maple

    Black Olive

    Gumbo Limbo

    Green Buttonwood

    Royal Poinciana

    Ficus

    Jacaranda

    Mango

    Avocado

    Slash Pine

    Live Oak
    Small Palms – Less than 20′ at maturity. Can be planted adjacent to power lines, etcetera.
    Bamboo Palm

    Bottle Palm

    Pygmy Date Palm

    Lady Palm

    Dwarf Palmetto

    Saw Palmetto

    Christmas Palm
    Large Palms – Greater than 20′ at maturity. Plant at the average frond length plus 2′ for minimum clearance from power lines, etcetera.
    Paurotis Palm ( 5′ frond length)

    Alexandra Palm (7′)

    Fishtail Palm (8′)

    Coconut Palm (15′)

    Date Palm (15′)

    Royal Palm (15′)

    Cabbage Palm (7′)

    Queen Palm (12′)

    Washingtonia Palm (7′)
    Trees and palms are a very useful and important part of our landscapes. They provide shade and cool the air, act as wind breaks, screen objectionable views, frame views, soften architecture or act as a backdrop.
    Select your trees carefully, plant them in the right place and they will grow into the beautiful, mature trees which nature intended without damage to neighboring utilities or structures.
  • Pruning the shrubs after our colder winter months

    Pruning the shrubs after our colder winter months

    After our colder winter months it is time to start thinking about pruning the shrubs in the yard to remove any cold damage or just to renovate, reduce size and prepare them for the summer growing season. We were lucky this year and did not have much serious cold weather or damage to our more tropical plants. It is never a good idea to heavily shear shrubs during the colder winter months and so when spring arrives it is a good time to get everything back into shape.
    Removal of dead, weak or cold damaged wood, and disease and insect infested wood is an effective way to stop the spread of disease and insects to other plant parts or neighboring plants. This will be especially important for those cold damaged plants in your landscape which can easily develop disease problems as the damaged wood begins to rot. This in turn can attract insects. Always disinfect your pruning tools after pruning diseased wood, using a weak bleach solution, to prevent the disease from being spread to healthy wood. Your pruning should be followed by an application of fungicide on the plant to protect the healthy wood and new growth from any invasion of active disease organisms on your plants.
    To rejuvenate old shrubs, trim to remove old stems and branches. This can be done every year and is a good procedure if the plant has become leggy or is growing out of the bounds of your gardens. Most shrubs are pruned to maintain or develop a desired size or form. Selective pruning can shape plants and produce either a thin or thick plant. Plants can be renovated with pruning by either heading back or thinning. Heading back is the selective cutting of the ends of branches to a bud. This procedure produces a denser shrub because it increases the number of shoots and leaves. When heading back make the cut on a slight angle, 1/4 inch above a healthy bud. The bud should be facing the direction preferred for new growth.
    Thinning is the complete removal of branches back to the large lateral branches, the main trunk or to the ground. Thinning gives a plant an open and natural appearance and encourages healthy new growth.
    We prune ornamental shrubs to improve their health and appearance. You should prune overgrown plants back gradually, over a period of years, as severe pruning can damage plants. Constant shrub shearing can also kill. Regularly shearing shrubs to the same height with gas shears will weaken them, make them leggy and susceptible to disease and insect problems eventually kill them. Yet, hedge shearing has become the norm. People actually expect all of their shrubs to look like square boxes, round spheres or cones and umbrellas. They call it the “manicured look”. And because everyone is doing it they think it’s the right way to do it. It’s not! You can get away with it for a number of years and since the ruining process is so slow, when things start to go wrong no one thinks of the pruning practices as the problem. When you shear shrubs regularly you expose them to unnatural conditions. It is a bad horticultural practice to remove the terminal (end of branches) buds week after week, year after year. A plant only has so many axil buds and dormant nodes to replace those lost to pruning. This new growth is important for plant health as plants get their food (sugar) from the sun through their leaves during the process of photosynthesis. As new growth occurs, the hedge shearer cuts it off so as to maintain the manicured look and they trim off the food delivery system used for future food production. This food is used to produce more plant tissue and most of it goes to the root system. So imagine the poor plant with no food to the roots for overall vigor and then you use up all axil buds and dormant nodes for new leaf growth – well I think you get the picture.
    Plants pruned into different shapes creating landscape oddities, such as animals, are called a topiary. Or you can grow plants against a wall known as an espalier, which requires a special pruning technique. Plants trained in this manner are specimen plants and not all plants are adaptable to these techniques. Pyracantha, loquat and podocarpus are a few that make excellent espalier plants.
    Flowering plants should be pruned at the proper time of year. Spring flowering plants such as azaleas or gardenias should be pruned immediately after flowering. They set flower buds on the previous season’s growth and the buds overwinter on this older growth. Pruning these plants in late summer or just before spring flowering would remove a greater portion of the flower buds and thus future flowers. Plants that flower on current season’s growth such as hibiscus, rose, oleander or bougainvillea should be pruned while dormant or before a new flush of spring growth. Most evergreens such as podocarpus, holly or arboricola can be pruned anytime.
    For some shrubs, such as gardenia or croton, you should not use hedge shears but cut each branch separately using hand shears. This will maintain a neat informal shrub that retains its natural shape. A properly pruned shrub is a work of art.
    The method of pruning hedges depends on the type of hedge desired. Informal hedges consist of a row of closely planted shrubs which are allowed to develop into their natural shape. Annual pruning consists of cutting just enough to maintain the desired height and width.
    Formal or clipped hedges require continuous pruning during the growing season. The desired appearance of a formal hedge is a soft outline of foliage from the ground up. Two important things to remember when pruning formal hedges are (1) hedges should be clipped while new growth is green and succulent and (2) plants should be trimmed so the base of the hedge is wider than the top. It should also be noted that constant over shearing of hedges can cause the tips of branches to die back and develop disease. Cocoplum is especially susceptible to this problem. Be sure you have something to prune before you put your shears to the plant. Hedges pruned with a narrow base will lose lower leaves and branches because of insufficient light. This condition will worsen with age resulting in sparse growth at ground level and an unattractive hedge which will not give the desired privacy.
    When the wrong shrub is planted in the wrong place, it is often necessary to over prune to keep the plants from interfering with each other and growing out of the bounds of the garden. To avoid this costly mistake, learn the mature size of the plants and then plant them in an area that will not require over pruning to maintain them in that area.
    Your pruning tools should include the following:
    Hand pruners – used to cut branches up to 1/4 inch in diameter.
    Loppers – used for limbs up to 1 ½ inches in diameter.
    Hedge shears – used to shear formal hedges.
    Saws – used to cut branches too large to prune with loppers.
    Pole saw and pruner – used to prune difficult to reach branches.
    Chain saw – probably better left to the professionals
  • Blooming Hibiscus

    Blooming Hibiscus

    Hibiscus plants are blooming profusely all over Marco right now. This plant seems to love the cold weather. Perhaps it is because the severe cold helps control some of the insects that constantly cause the blossoms to drop. Whatever the reason enjoy the beauty of these glorious flowers.
    Hibiscus is believed to be native to China and were seen in the South Pacific and Hawaii before showing up in Florida.
    Most varieties have flowers that last one day. The blossoms open early in the morning and are gone by afternoon. Some varieties have flowers that remain open for two days. Although the individual flowers do not last long, the flowering season is nearly all year in South Florida.
    People select a hibiscus variety (of which there are many) on the basis of plant growth and size or the form and color of the flowers. Plants range from low, spreading forms to upright varieties reaching twenty feet in height. Some are compact and dense while others are open and thin.
    There are tremendous flower variations amongst varieties. There is a broad range of color combinations, color shades and flower forms. Hibiscus flowers are basically characterized as single or double forms with variations in the number and arrangements of petals.
    Picked flowers do not have to be placed in water but should be kept in a cool place. The flowers may be saved for evening use if picked just after they have opened in the morning and refrigerated until needed.
    Hibiscus is used in the landscape as informal hedges or screens, foundation plants or as background for other plants. They do not perform well as formal sheared hedges. Groupings of similar plants are usually more effective than mixing several varieties due to different growth habits. Most varieties can also be trained to grow with a single trunk and are called “standards”.
    Plants can be killed to the ground by 28 – 30 degree F temperatures, but established plants may come out in the spring and bloom on new growth that summer. Hibiscus should be protected from cold northern winds using fences, buildings, trees, etc. They do not tolerate salt spray or saline irrigation water.
    Generally, half a day of direct sunlight is the minimum requirement. Hibiscus plants do not tolerate saturated soils or “wet feet”. However, they do require adequate water and will need regular irrigation during periods of drought. About once a week. Also, never plant a hibiscus in a location with an old root system that is still decaying. This can cause disease.
    Regular fertilization is essential for healthy vigorous plants. Hibiscus bloom best when fertilized lightly and often, three or four applications a year. An ample supply of micro-nutrients is essential. There are commercial mixtures containing the necessary micro-nutrients making it very convenient for the homeowner to properly fertilize.
    Heavy pruning is best done in the early spring and should not be done in late fall or in the winter. Light maintenance pruning may be done any time of the year. Blooming is delayed and reduced if the plants are pruned heavily during the active growing season because blooms are produced on new growth. By cutting the longest, one-third of the branches each month you avoid the need for heavy pruning.
    Many pests can feed on hibiscus making this a very high maintenance choice for your landscape. Chewing insects include caterpillars, grasshoppers, snails and slugs, beetles, cut worms & leaf miners. Piercing-sucking insects include scale, mealybugs, spider mites, aphids, whiteflies and thrips. These pests are more of a problem in areas of poor circulation. The grenade scale can be hard to see because it blends with the bark. This soft scale will cause branches to die back. Premature, flower bud-drop has become a more serious problem with hibiscus in part due to the gall midge.
    I will go into more detail on the problems of hibiscus and discuss solutions next week.
  • Earth Day

    Earth Day

    This week we celebrate Earth Day. This holiday was first celebrated in 1970. It is a great day to think about the beautiful environment surrounding us on Marco Island and how to perhaps create habitats (think your yard) that are more friendly and inviting to the environment and the creatures that call it home.
    The flora and fauna of South Florida are quite diverse, made up of microclimate environments called communities. Each of these communities has its own plants and animals that rarely leave their own area. These are broken out as coastal dunes, hammocks, freshwater swamps or wetlands, saltwater wetlands, sand pine scrubs, dry pineland and pond and river margins. Marco Island has areas that would apply to all of these communities.
    Coastal dunes B Hideaway beach; Hammocks B Indian Hill or Key Marco; Freshwater swamps or wetlands B Marco Lake; Saltwater wetlands B along Caxambas Drive, behind Sheffield or Key Marco fringe; Sand pine scrub or dry pine land B inland Marco Island and river margins along the Marco River.
    The majority of our flora is tropically oriented. Nurseries tend to sell a lot of imported exotic plants from other places but there is a trend back to native plants as awareness of water and energy issues arise. True native plants can better survive our seasonal weather extremes without special care and watering once established. They also provide habitat for local fauna. While still hard to find, more and more local nurseries are able to obtain most natives you might want. The fire bush flowers all year and attracts butterflies and the beauty berry has bright purple berries that the birds love.
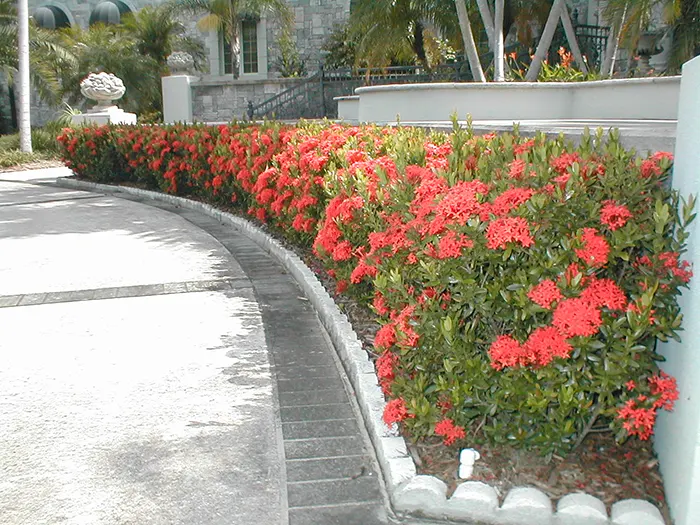
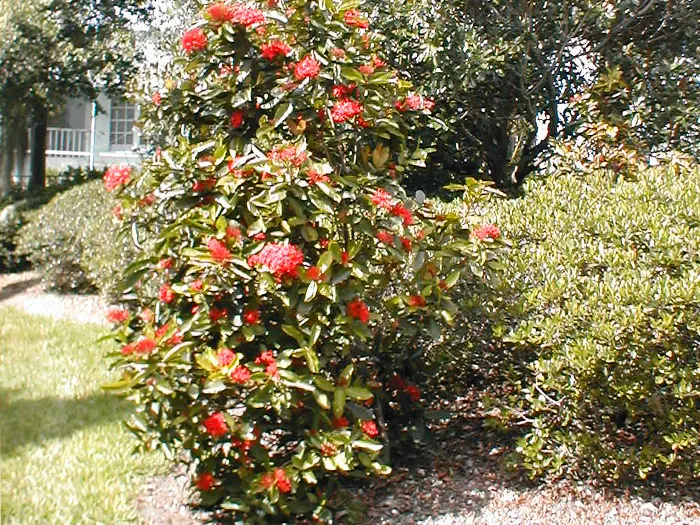
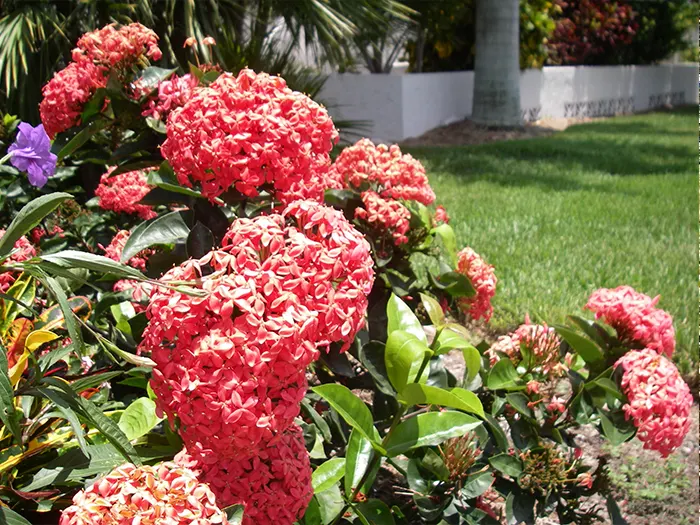
    A lot of the more colorful shrubs, which were imports long ago, have become such a common site they are considered by most to be native. Hibiscus, bougainvillea and ixora are a few examples that fill our landscapes with color. While they are beautiful, they require constant care from insects and disease, cold damage and extra watering. A trend toward using exotics more sparingly and introducing more native plants to our landscapes would be a good thing.
    As our island develops the last remaining habitats for our local fauna are disappearing. Some, such as the egrets and eagles, have adapted to life with man. Egrets would get in front of my mower and I would have to come to a complete stop as they went after the bugs I stirred up. A nesting pair of eagles lived in a nest for over twenty-five years two feet from the back yard of a house I maintained on Shadow Ridge Court. This lot happens to be at the end of the practice driving range of the Island Country Club. These eagles endured my lawn mower, weed whip and hedge trimmers as well as the big machine that traverses the driving range picking up the golf balls at the end of the day. Not to mention the occasional wild ball that probably hit the nest. I watched many baby eaglets fledge from this nest. Others, like the pink flamingo and the quail, have slowly perished. I used to love watching quail families cross the streets. You rarely see them anymore. The pink flamingos will hopefully stay around since they were blown back to Florida on hurricane winds a few years ago. The quail, like the burrowing owls, lived in our vacant lots, which are mowed regularly. We now protect the burrowing owls but it is too late for the quail. One thing we could do to try to save some of our local fauna is to create backyard habitats for wildlife. This does not necessarily mean you have to have a wild yard. You should simply think about your plant choices and consider how these plants could help the wildlife you would like to attract. Provide small fruits and seeds for birds and a source of water. Have tall grasses or a brush pile for animals to hide in. Leave open sandy areas and begin a burrow to attract owls or tortoises. Native plants are a better choice since Florida wildlife evolved with Florida plants. Maybe the city would consider allowing vacant lots to return to a native state to become mini wildlife refuges.
    To create an environment that suits your property, keep your environmental community in mind. Don=t try to grow salt sensitive plants on the beach or plants requiring good drainage in low, boggy areas. A jungle or hammock will be cooler in the summer and warmer in the winter because they maintain a uniform climate of high humidity and frost- free temperatures making then suitable for most tropical plants. After establishing the more hardy canopy plants you can introduce the more tender, under-story plants as the yard begins to mature.
    Things to remember when creating a habitat are:
     You must provide food, water and cover for the wildlife.
    The habitat area must be at least 10 square yards.
    You should use at least 50 percent native plants in your habitat area.
    You do not have to completely re-landscape to establish a habitat. Select a small area of your landscape and add some of the features listed above. An example could be a flower garden to attract butterflies with a birdbath in the middle. The flowers would provide food for the butterfly larvae and the larvae would provide food for birds attracted by the birdbath. We installed a pond system in our back yard and have several bushes and trees with fruits and berries. We love watching our backyard as the diverse species of birds and butterflies come and go. We see cardinals, blackbirds, redheaded woodpeckers, pileated woodpeckers (I just saw one two days ago), purple martins (there are special houses for them), and the favorite with our visitors, a gray heron that feeds on frog eggs from the ponds when available. There are many more I have not identified who stop in on their migration north or south.
    Or, if you have always wanted to live in the woods you can create your own jungle or hammock and screen yourself from your neighbors, street noise, cut your fuel bill and attract birds, butterflies, squirrels and other small creatures to your yard, not to mention spending less time, energy and money keeping a lawn in shape. The most maintenance needed would be to pick up fallen branches and pull unwanted weeds. If properly planted, a jungle or hammock on a small lot can be attractive in the wild state. You can experience and live in the real thing in the community of Key Marco. Their woods are home to bobcat families with kittens and one of the largest tortoise populations on Marco. One spring day I watched as a flock of Indigo Buntings flew by in undulating beauty.
    Some animals are happy to live in our neighborhoods as they are, no changes needed. The homes on Dogwood and Sheffield have similar plant communities and wildlife as does Key Marco with bobcats spotted running through the yards and many tortoise burrows. You now see many rabbits darting from yard to yard taking refuge under hedges and bouncing through the vacant lots. The end of Laurel Court used to have a resident chicken! This chicken would garden alongside me happily eating whatever I stirred up for him. What a treat. And let us not forget the snakes. I have been begging people to leave them alone and not kill them for years. I do see more large snakes now than I have in the past but we still have a long way to go on that one. Remember they eat rats and keep the populations down so we don’t have as many in our attics.
    We are all so fortunate to live on an island surrounded by exotic tropical plants, birds and animals which most people never have the pleasure of seeing in their lifetimes. Rather than scaring them all away with our development let us develop habitats in our own backyards to attract them to live alongside us here on beautiful Marco Island. Happy Earth Day everyone!
  • Unusually wet start to spring

    Unusually wet start to spring

    While it has been an unusually wet start to spring, April and May can be very dry months averaging only 2.03 inches of potential rain fall. Add to that the higher temperatures, low humidity and wind and you end up with a high evapotranspiration rate. Evapotranspiration (ET) is a process by which water is transferred to the atmosphere from vegetative surfaces. ET consists of two components, evaporation and transpiration. Evaporation is a physical process by which water is changed from a liquid to a gaseous state. Evaporation takes place from free water surfaces such as ponds, streams, wet soils or wet vegetation. Transpiration, the other component of ET, is a plant process of water loss. That is where the term evapotranspiration came from.
    Here in South Florida our sandy soils can experience drought conditions after only a few days without rain. This condition is made worse by high temperatures. In order for our lawns to survive with little or no water they must be conditioned before a drought occurs. Supplemental irrigation usually provides adequate water for lawns between rainfalls. But in the past water management districts have enforced severe water restriction schedules, allowing watering only once a week or less. We are under a twice a week restriction now. It is important to prepare your lawn for drought now so it will survive such severe restrictions as you never know when a drought will occur.
    Your primary objective is to grow a good healthy lawn that will survive with little or no supplemental irrigation. A properly prepared lawn will have a deep, extensive root system that can withstand the stress of such reduced irrigation. This can be achieved through proper management practices.
    Proper irrigation is the first step. Frequent, light watering can cause shallow root systems that are not good for a healthy turf. To develop a deep root system, water only when the lawn shows the first signs of wilt. This means twice a week at most and preferably only once a week. Then apply enough water to wet the soil in the root zone, approximately one inch.
    Knowing the amount of water your sprinkler system applies to your lawn is an important step in using water efficiently. Most people irrigate for a given number of minutes without knowing how much water they are really applying. Use this method to determine how long to irrigate to apply one inch to your lawn.
    Calibrating or determining the rate of water your sprinkler system applies is an easy job.
    1. Obtain five to ten coffee cans, tuna fish cans or other straight sided containers to catch the irrigation water. Containers three to six inches in diameter work best.
    2. Place the containers in one zone at a time. Scatter the cans at random within the zone. Repeat the entire procedure in every zone because there may be differences in the irrigation rates.
    3. Turn the water on for fifteen minutes.
    4. Use a ruler to measure the depth of water in each container. The more precise the measurement, the better your calibration will be. Measurements to the nearest eighth of an inch are adequate.
    5. Find the average depth of water collected in the containers by adding the depths and then divide by the number of containers.
    6. To determine the irrigation rate in inches per hour multiply the average depth of water times four.
    Try to calibrate the system during the same time the system is normally run so that water pressures are similar. Low water pressure can significantly reduce the amount and coverage of water applied by a sprinkler system. Never apply more than one inch of water per irrigation. Avoid mixing sprinkler head types. Mist heads apply more water than stream and rotor heads. Match sprinkler heads for uniform coverage. Check your system frequently. Replace broken heads, clear clogged nozzles and adjust the direction of spray. Now that you know your sprinkler system irrigation rate, you can more efficiently apply water to your lawn.
    It may take up to six weeks to condition your turf to survive several days or more without wilting between irrigation or rainfall. During this time the root system is developing and growing deeper into the soil.
    Proper mowing practices are also essential for a drought prepared turf. Every time a lawn is mowed the grass is stressed which reduces root growth. Mowing frequency and height of cut should be carefully considered. The majority of lawns on Marco Island are being cut too short. Use the highest setting on the mower as a short cut will stress the turf. By increasing the grass leaf area, more photosynthesis can occur. This means more carbohydrates for plant growth, especially root growth. The higher the height of cut on a lawn the deeper and more extensive the root system will be. Adjust the frequency of mowing to the growth of the turf. At least once a week in summer, while once a month may be enough in the winter. Try not to cut off more than a third of the blade with each cut. Also, keep the mower blades sharp. A clean- cut leaf blade will heal more quickly and thus lose less water than a shredded blade.
    Proper fertilization practices can enhance the drought tolerance of grass. All the drought conditioning accomplished by proper irrigation and mowing practices may be eliminated by excessive nitrogen fertilization. Shoot growth is enhanced and root growth reduced by excessive nitrogen. Drought conditioning can only be accomplished by applying just enough nitrogen to obtain a small, but continuous, amount of growth. Lawns should never be fertilized to deepen the green color since St. Augustine grass is naturally more yellow-green. Potassium fertilization promotes increased root growth and thicker cell walls. Drought tolerance is improved by applying potassium. Grass requires potassium in nearly the same amount as nitrogen, especially in sandy soils where both can readily leach out. In times of drought a 15-0-15 lawn fertilizer would be preferable over a 16-0-8 analysis. In addition, the palms in your landscape require more potassium than nitrogen and would also benefit from the higher potassium content in your lawn fertilizer.
    Pest control on lawns should be done with great care during the hot, dry spring months because pesticides can add extra stress through phytotoxicity (chemical damage to plants). Pesticides should never be applied on a preventative basis. When a pest problem is diagnosed however, it should be treated appropriately as necessary. Spot treatments can be as effective as treating the whole lawn. Be particularly watchful for insects and diseases which attack the grass root systems such as grubs or root rots.
    If you have areas in your lawn which will not survive without extraordinary care consider using mulched beds, shrubs and ground covers which do not require supplemental irrigation.
    Even if we begin to have a lot of rain, we should not squander our water. Prepare your lawn for drought and save our valuable water resources every day of the year.
  • Proper irrigation

    Proper irrigation

     Proper irrigation is very important for plant health. Too much or too little can both be damaging to plants.
    I’ll begin with a description of a process called evapotranspiration. This process combines evaporation and transpiration. Evaporation is when water changes from a liquid to a gas and moves into the atmosphere from the surface of bodies of water, wet soil or wet plants. Transpiration is a process the plant uses to cool itself. Water is taken up by the roots from the soil or into the leaves from rain or irrigation and translocated through the plant and exits from the stomata in the leaves cooling the plant as it exits. The process is much like our own perspiration for cooling our bodies.
    Evapotranspiration rates vary with the type of plants as well as the weather. And irrigation should be adjusted accordingly to avoid the dreaded over and under watering I mentioned. The hot, dry and windy spring months have the highest evaporation rates. But the hottest months of summer are also have some of the highest evaporation rates. It is a common practice to turn irrigation systems off during the summer rainy season but this causes the death of many lawns in the summer. Rain can be sporadic to nonexistent at times and it doesn’t take long for our sandy soils to experience drought conditions. And that means the plants have no water to take up from the soil or absorb from rain and no way to cool off during months with the highest transpiration need. It’s like a person being stuck in the desert with no water. The cooler months of late fall and winter are the months to save on your water bill since the evapotranspiration rate decreases greatly during those months. And many people over water in the cooler months because there is less rain and they feel the plants need more irrigation which brings on disease. And then if disease does appear it causes the cells to collapse and so they cannot translocate the water and the plants turn brown which people mistake for a need for more water. In fact they are feeding the fungus and causing death.
    The main objective is to grow plants that will survive with little to no irrigation. You want a deep extensive root system which can be achieved using proper management practices. And proper irrigation is the first step.
    Frequent light watering can cause a shallow root system. To develop a deep root system you should only water when plants show a sign of need. Like wilting. This is usually only twice a week at most and preferably only once a week. And when you do water only apply enough to wet the root zone, approximately ½ to ¾ of an inch with each watering.
    The next step is to figure out how long to irrigate to apply ½ inch to your lawn and plants. Most people run the sprinklers for a given number of minutes without knowing how much water they are really applying. Determining the rate of water your system applies is a pretty easy job.
    Obtain five to ten straight sided containers to catch the irrigation water. Tuna cans or something similar in size are perfect.
    1. Place the containers in one zone at a time scattering them at random within the zone. Repeat this in every zone because there may be differences in the irrigation rates.
    2. Run the water for fifteen minutes.
    3. Use a ruler to measure the depth of water in each container. Measurements to the nearest eighth of an inch are adequate.
    4. Find the average depth by adding the depths and then divide by the number of containers.
    5. To determine the irrigation rate in inches per hour multiply the average depth of water times four.
    Try to calibrate the system at the same time of day that it is run so that water pressures are similar. Low water pressure can reduce the amount and coverage of water applied by the system.
    Never mix sprinkler head types. Mist heads apply more water than stream and rotor heads. You need to match sprinkler heads for uniform coverage. A mist head can apply the needed ½ inch in 15 minutes where a rotor head will need 30 to 60 minutes depending on whether it is a 180 degree radius or a 360 degree radius. If you mix these in the same zone you will be applying too much or too little depending on how long you program the zone to run. Match sprinkler heads for uniform coverage. It can take a month or two to condition your yard to survive several days between irrigation or rainfall. During this time the root system is developing and growing deeper into the soil.
    You need to check your system frequently, especially if you see dry spots appearing on the lawn or shrubs and flowers wilting. You may have broken heads, clogged nozzles or need to adjust the direction of the spray. Also check that shrubs have not grown over the heads and are now blocking the water from reaching areas. You should not run the sprinklers longer trying to turn the brown spots green because most likely there is no water reaching those areas and running it longer will not change that.
    Watering your flower beds should be a special consideration. Overhead watering can cause disease and so drip irrigation is the way to go. It is best to tap into a rotor head zone if possible since they will typically run for 45 to 60 minutes which is ideal for a drip irrigated flower bed.
    Lawn zones should be separate from shrub zones since they need to run longer and tend to have rotor rather than mist heads. It depends on where the lawn zone is located. Is it in the full sun or shade? On a hill or flat surface? Do the heads need to turn 180 or 360 degrees. You need to time the zone according to the different conditions.
    Shrubs may need little to no irrigation once they are established. Shrubs have a more extensive root system than either lawns or flowers and so can go longer between watering than either of those.
  • I love the woods

    I love the woods

    I love the woods. I was born and raised in Vermont and Connecticut where the woods were my play ground. As the population around America increases it has become necessary to set aside natural areas to preserve native plant and animal communities. Tract K, which was set aside as a school property, is now being considered for a park. If properly managed and planted it could become a large natural area. There is also another passive park area along Winterberry Drive which now has a few trees planted with some lovely native flowers along a winding shell walkway to take you through the area. With some well placed under story plants, this could become another native habitat for Marco Island wildlife. There are other areas which could become Marco Island natural areas for local wildlife. Two communities, Key Marco and Hideaway Beach, have set aside large areas which are to remain in their natural state. Both communities have problems with invasive exotics which are causing harm to the native plants meant to be protected and preserved. These special areas should shelter and provide habitat for our dwindling wildlife population but may not be able to if the invasive exotics take over.
    You must manage natural areas to control these invasive species and minimize damage to native vegetation and soil. It takes time and caution to clear these natural areas of invasive species. Current methods being used to manage these nonnative plants include manual removal, mechanical removal, physical controls, herbicides and biological control. Each control can be used independently or in combination with one another.
    The spread of invasive vegetation can be reduced by educating the public and local government on the identity and control of these invasive plants. It is the responsibility of those who are aware of the problems caused by invasive nonnative plants to educate others about their impact and control to prevent further ecological damage of natural ecosystems. I hope this column helps.
    Integrated Pest Management is an important tool for control involving the introduction of reproducing foreign insects or diseases as biological controls for natural areas. However, their development can take years and cannot be expected to solve all the problems.
    Manual removal is time consuming and costly but is often a major component of invasive plant control. Seedlings should be repeatedly pulled from the ground as tenacious roots continue to sprout.
    Mechanical removal involves the use of bulldozers or other special equipment. This method can disturb the soil creating conditions for re-growth of the invasive species. This method should not be considered in natural areas where non target vegetation could be damaged by the use of the equipment.
    Fire is a normal part of Florida’s ecosystem. Many native specimens have evolved with varying degrees of fire tolerance. The suppression of fire alters historical plant communities by encouraging less fire tolerant species. This lack of maintenance around the country is one of the reasons we are experiencing so many out of control wild fires. Closer to home our many hurricanes over the last decade downed many trees in our local natural areas that have not been removed. These downed trees and under story plants are now drying out and becoming a fuel load for local wild fires. We all need to be extra vigilant with cigarettes, parking in tall grass, barbecues and any other potential source of fire when near any of these natural areas.
    The invasion of trees and plants by exotic vines and other climbing plants can often result in the suffocation and death of mature trees and plants. They also increase the danger of canopy fires and the resulting death of more mature trees.
    Reestablishment of natural plant species by planting native plants in areas of nonnative species removal can be an effective, though expensive, way to reduce the re-invasion of exotic species. If plant material is introduced to the natural habitat, screening for unwanted pests, plant or animal, should occur. Also, the establishment phase of newly planted natives can affect the management practices of a natural area. When you disturb the soil to plant or add temporary irrigation to water new plants you create an invasive plant management technique into a native area. Little is known about natural areas tolerance to these intrusive practices. It is always best to allow these areas ample time to regenerate naturally.
    Herbicide uses have been approved by the Environmental Protection Agency for use in natural areas. These approved chemicals are for specific sites, i.e., crops, terrestrial non-crop or aquatic sites. The herbicides recommended for invasive plant control are systemic. They are absorbed by foliage, roots or bark. It is very important to choose and properly use the correct herbicide so as not to harm non target plants near by which may be more sensitive to the herbicide.
    Following are three examples of severely damaging invasive plants in our area.
    Air potato ( Dioscorea bulbifera) – Air potato is a vine which can quickly engulf native vegetation in natural areas, climbing high into mature tree canopies. It produces bulbils, which help it spread and make it extremely difficult to eliminate because new plants sprout from every bulbil. When the vines are growing up into trees, the vines should be cut and destroyed. Herbicide applications and removal of as many bulbils as possible must occur to prevent the spread of the vines into new areas. It can require successive years of follow up maintenance to bring this invasive plant under control in native areas.
    Brazilian pepper (schinus terebinthifolius) – Brazilian pepper is a small shrub-like tree at 15 to 30 feet high which aggressively invades Florida’s disturbed habitats, hammocks, pine lands, mangrove forests and canal banks Florida. Their bright red seeds are dispersed by racoons, opossums and birds. Brazilian pepper forms a dense forest that shades out all other plant life and provides poor habitat for wildlife populations. This small tree can spread, kill and destroy natural areas near by and should be encouraged to be removed where ever it is found.
    Australian-pine (Casuarina equisetifolia L.) – This tall, fast growing pine was introduced to Florida in the late 1800’s as windbreaks and shade trees. Seeds germinate easily and it spreads rapidly. Its rapid growth, dense shade, dense litter accumulation and other competitive advantages make it extremely destructive to native vegetation. It encourages beach erosion by displacing deep rooted natives like sea oats and interferes with nesting sea turtles and the American crocodile. It is sensitive to fire, loses branches easily and topples easily in high winds. It produces compounds in the soil that inhibits growth of other plants much like the Brazilian pepper.
    Invasive plants are a problem as big as the invasive animals that have been in the news lately. Learn to identify them and remove them before they can spread.
  • Caterpillar Season

    Caterpillar Season

     It is caterpillar season and if you love butterflies and are encouraging them in your yard this is an exciting time. However, we have several caterpillars that can harm you with their nasty sting so you should be aware of them. There was an article in the paper a while ago about the Puss caterpillar but you should know there are others out there that inflict the same painful sting as the Puss.
    Stinging caterpillars sting via spines which are connected to poison glands. They feed on the foliage of many different plants. They do not usually inflict serious injury to the plants they feed on. However, their sting can be very painful when a person’s skin comes in contact with them. Some people have severe allergic reactions and have to visit a doctor or emergency room. Most people just experience itching and burning pain from the contact. Following are the four most common stinging caterpillars for our area.
    The Puss Caterpillar is short and stubby bodied about one inch long completely covered with gray to brown hair. It reminds me of the Adams Family character “Cousin It”. The poison spines are under the soft hair. When touched the spines break off in the skin and cause severe pain. Puss caterpillars prefer oaks and citrus.
    The Saddleback Caterpillar is a very striking insect. It is brown with a distinctive green back and flanks with a conspicuous brown, oval central area. This spot looks like a saddle placed on a green saddle blanket, hence the name. It is also a short, stubby bodied caterpillar about one inch long. The main stinging hairs are on the back of fleshy protuberances toward the front and hind ends of the body. There is also a smaller row of stinging hairs along each side. You will find this caterpillar on many types of plants but especially palms.
    The IO Caterpillar is a beautiful pale green with yellow and reddish stripes. It can exceed two inches in length. Its’ stinging spines, which are usually yellowish with black tips, cover the body from tip to tip. Ixora, hibiscus, palm trees and roses are favorites of this caterpillar.
    The Hag Caterpillar has nine pairs of variable length protrusions that bear stinging hairs extending from the body. These extensions are curved and twisted like the disheveled hair of a hag for which it is aptly named. Its’ sting is as intense as that of the saddleback. This caterpillar is found on various forest trees and ornamental shrubs. It is not as common as the other three mentioned.
    The colors of these caterpillars camouflage them well on the plants. People who are stung are often left wondering what gave them that painful sting. Telltale signs of their presence include chewed leaves and defoliated branches. Also look for piles of brown to black pellets (fecal matter) on leaves of the affected plant. You should wear a long sleeve shirt, pants and gloves when working in infested areas.
    Local reactions to the sting include severe burning, pain, numbness and swelling of the area of contact. You can also have rows or grids of marks on skin and possibly swelling on regional lymph nodes. You can treat by placing tape over the affected area and repeatedly stripping it off to remove poison spines. Apply ice packs to help reduce the stinging sensation and apply a paste of baking soda and water.
    Allergy reactions include nausea, vomiting, fever, shock and convulsions. If you have a history of hay fever, asthma or allergy or if allergic reactions develop you should contact a physician immediately after being stung.
    These caterpillars are not usually numerous on plants and can be controlled by carefully removing them and squashing them. Also watch for the telltale sign that a natural predator, the parasitic wasp, has been there. You will see small white cocoons emerging from the body of the caterpillar. These are eggs which the female braconid wasp thrusts through the skin of the caterpillar. The young larvae will hatch from these eggs and eat within the body of the caterpillar thus killing it. People often mistake these cocoons for caterpillar eggs and destroy them thinking it will reduce the population of the caterpillars. My experience is that if you have the wasp present it will effectively control the current and future generations of the caterpillars. If the wasp is not present upon first inspection the telltale cocoons will almost always appear within one to two weeks and are worth waiting for.
    If you feel you must use insecticides for control use the Bacillus Thuringiensis (Dipel or Thuricide) rather than Sevin so as not to harm the wasps if they are present.
    I will write about the delights of having butterflies in your yard next week.
  • Serious consequences of soil compaction when trying to grow anything green

    Serious consequences of soil compaction when trying to grow anything green

    Soil compaction can bring with it serious consequences when trying to grow anything green. In fact it can be almost impossible to establish or maintain plants in compacted soil because it interferes with the movement of water, air, nutrients and roots in the pore spaces between soil particles. This makes root penetration and growth harder leading to poor shallow rooting, poor plant growth and a greater need for irrigation and fertilizer. As a result soil compaction can result in increased costs for the homeowner for water, fertilizer and in the end plant replacement. Compaction issues also have a detrimental effect on the environment because of increased erosion and runoff volumes, which in turn increases the delivery of nutrients and other pollutants to nearby water bodies. Since all the fertilizer and water being put on the compacted landscape cannot percolate down through the soil to be used by the root systems to filter out these pollutants they have nowhere to go but into the surrounding ecosystem. Obviously not a “Best Management Practice”.
    Compaction can be caused or exacerbated by driving on landscapes with heavy equipment during construction or constant traffic such as using unpaved areas as driveways or for parking. Walking will also cause areas to decline, especially in St. Augustine grass which does not tolerate foot traffic well. This problem can be accelerated if the soil is wet. The best way to deal with soil compaction in the landscape is to prevent it from happening. You should limit, or eliminate, the amount of traffic over future or existing planting areas. In fact many municipalities have rules pertaining to the protection of existing plants when building on a site. Marco Island’s Article IV. Landscaping code states (b) During construction, all reasonable steps necessary to prevent the destruction or damaging of existing vegetation shall be taken. No excess soil, additional fill, equipment, liquids, or construction debris shall be placed within the drip line of any vegetation that is required to be preserved, or that will be credited towards the required landscaping. And also (c) Protective barriers shall be installed and maintained beyond the drip line of all retained vegetation unless site improvements prohibit installation of barriers beyond the drip line, and shall remain in place for the duration of the construction process phase. The location of the protective barriers shall be determined by a landscape architect or design professional. These rules are in place because the constant traffic means the plants will not be a viable part of the landscape once the root system has been compacted.
    There are few options for improving compacted soil. Deep tillage or sub-soiling using large machinery to break hardpans and loosen the soil can be impractical in urban areas because of buried utilities and the expense of dealing with those. Obviously it would mean removing all vegetation and beginning again in an existing landscape. The only place this would be considered is at a construction site before installation of utilities or landscaping. Shallow tillage will break up surface soil but can only reach the first six inches. While it would not damage utilities it could not be used around existing trees or turf due to root damage. Plug aeration is not as effective as shallow tillage but can be used in turf. And air tillage can be used around trees but not turf. Once again it is an expensive proposition to correct soil compaction if it can be corrected at all. So the best course of action is to prevent it from happening in the first place.
    Never use your landscape as a parking lot unless you have paved it first. If you find yourself walking on the same path to the boat dock, install some stepping stones. It looks much nicer than the dirt path or area that will eventually result from the constant traffic. In fact I believe Marco Island hands out code violations to property owners who park their cars on unimproved areas of their lawn and will require them to properly pave the area or park elsewhere. There is nothing attractive about dirt yards or swales. Marco Island is better than that.

[yith_woocommerce_ajax_search preset='default']